Backsplash refers to the material installed on the wall behind a countertop or stove to protect it from splashes, stains, and heat. It serves both functional and aesthetic purposes in a kitchen or bathroom. Sometimes when working on this project, it is difficult to figure out how to finish it. Wondering how to end the backsplash on an open wall? There are tools that you need and steps to follow so that it ends properly on an open wall.

What Is Backsplash?
Backsplash refers to a protective covering typically installed behind sinks, stoves, or countertops. It helps prevent water and other liquids from damaging the walls and adds aesthetic appeal to the space. Backsplash materials can vary, including tiles, glass, metal, or even natural stone.
How to End Backsplash On An Open Wall?
When you have an open wall without any cabinets or appliances, ending the backsplash can be tricky. However, there are steps you can follow to achieve a clean and polished look. Let’s look at the tools needed and then the steps to follow.
Tools Needed
The tools necessary for ending backsplash on an open wall may vary depending on the material used. However, some common tools include:
- Measuring tape
- Tile cutter or appropriate cutting tool
- Adhesive suitable for the chosen material
- Level tool
- Grout or caulk gun for finishing touches
Make sure to choose tools specific to your backsplash material to achieve the best results.

Steps to End Backsplash on An Open Wall
- Measure the length of the open wall where you want to install the backsplash.
- Choose the appropriate backsplash material that complements the overall design of your space. Common options include ceramic tiles, glass tiles, stainless steel sheets, or even natural stone.
- Prepare the wall surface by cleaning it thoroughly and ensuring it is smooth and dry. If necessary, apply a primer to help the adhesive bond better.
- Cut the backsplash material to fit the measured dimensions using a tile cutter or appropriate tools for the chosen material.
- Apply a thin layer of adhesive to the back of the backsplash pieces. Use a notched trowel to create grooves that promote proper adhesion.
- Press the backsplash firmly onto the prepared wall, starting from one end and working your way to the other. Make sure it aligns properly with adjacent sections or countertops.
- Allow the adhesive to dry according to the manufacturer’s instructions before proceeding.
- Once the adhesive has cured, fill the gaps between the backsplash pieces with grout. Use a grout float to spread the grout evenly and remove any excess. Wipe off any grout residue from the surface of the tiles with a damp cloth.
- Finally, seal the grout lines to protect them from staining and moisture penetration. Follow the sealer manufacturer’s instructions for the best results.
Why It’s Difficult to End Backsplash on An Open Wall
Ending a backsplash on an open wall can be challenging because there are no natural stopping points like cabinets or appliances. It requires precise measurements, careful planning, and skilled installation to ensure a seamless transition between the backsplash and the bare wall.
Other Recommended Maintenance
Now that you know about ending backsplash on an open wall, let’s take a look at a few other areas of recommended maintenance. One of those is checking that the kitchen exhaust is working. To do this, look for the kitchen exhaust vent and check that it leaves the interior of the home.
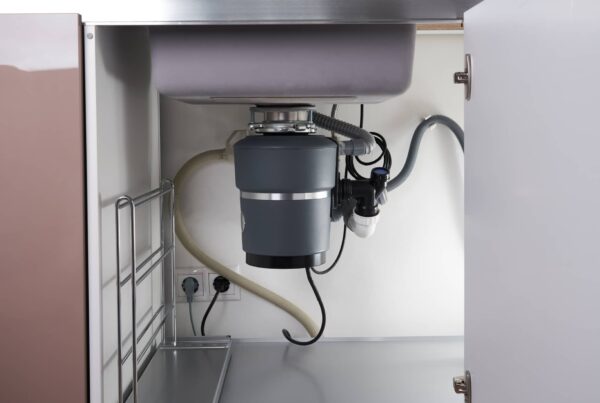
Another is garbage disposal is humming. There are a few reasons this may happen. It could be a clog in the motor, GFCI has tripped, or a faulty motor.
Lastly, it is important to make sure your oven is clean. Most ovens have a self-cleaning mode and it is important to make sure that you ventilate the house or leave the house while it is cleaning. This is because it has carbon monoxide gases that emit from the oven.
When Do I Call a Professional?
If you lack experience or confidence in your DIY skills, it’s best to call a professional for help. They have the expertise and tools required to tackle complex backsplash installations, ensuring a flawless outcome. Additionally, professionals can provide valuable advice and recommendations based on your specific situation.
Conclusion
Ending a backsplash on an open wall may seem daunting, but with the right techniques and materials, you can achieve a beautiful and functional result. Whether you decide to tackle it yourself or hire a professional, a well-executed backsplash will enhance the aesthetic appeal and functionality of your kitchen or bathroom. Call Waypoint Property Inspection to inspect your home in Tampa, St. Petersburg, Lakeland, Orlando, Palm Beach, Ft. Lauderdale, and surrounding areas.