The roof of a building is critical to its overall structure, and every component plays a vital role in ensuring its integrity and longevity. One such component that often goes unnoticed but is paramount for the protection of a roof is the drip edge. In this article, we will find out what is a drip edge on a roof, the purpose of it, and the benefits and types of each.
Let’s take a look!
What is a Drip Edge On a Roof?
A drip edge roof refers to the installation of drip edges, which are metal sheets installed at the edge of a roof. This component extends slightly off the edge of the roof and is designed to channel water away from the fascia and into the gutter system.
What is the Purpose of a Drip Edge Roof?
The main purpose of installing a drip edge on a roof is to prevent water damage by directing water away from the roof’s underlying materials and the building’s fascia boards. It helps to avoid deterioration caused by water infiltration under the roofing materials and down the siding.

Types of Drip Edge Profile and Benefits of Each
1. Type C (L-style)
Also known as “L-style,” this is the most common type and features a simple L-shaped profile. The benefits are:
-
- Ease of Installation: The L-style drip edge is straightforward to install, making it a popular choice for both professional roofers and DIY enthusiasts.
- Universal Fit: Its design is compatible with most residential roofing systems, ensuring a wide range of applicability.
- Cost Efficiency: Typically being the most economical option, it provides essential protection without a significant investment.
2. Type D (T-style)
Often referred to as “T-style,” this type offers a longer edge and is used in areas with heavier rain.
-
- Superior Water Diversion: With its extended outward flange, the T-style drip edge offers better protection by directing water further away from the fascia board and into the gutter.
- Heavy Rainfall Adaptation: It is particularly effective in areas prone to heavy rain or snow, as it can handle more substantial volumes of water runoff.
- Thick Roofing Material Accommodation: The design accommodates thicker roofing materials, such as architectural shingles, by providing the necessary clearance between the roof edge and the gutter system.
3. Type F (Gutter Apron)
This “gutter apron” style is designed for installation over gutter systems, providing enhanced water flow into gutters.
-
- Enhanced Gutter Compatibility: This profile is specifically tailored for seamless integration with gutter systems, ensuring that water is efficiently channeled into the gutters.
- Extended Overhang: The longer overhang of the gutter apron style provides additional protection against water seeping underneath the shingles and onto the underlying roof decking.
- Prevention of Water Backup: By facilitating smooth water flow into the gutters, it helps prevent the formation of ice dams and water backups that could lead to leaks and damage.
Each type of drip edge profile is designed to offer specific advantages depending on the roofing system and environmental conditions. Selecting the appropriate profile is crucial for maximizing the protective benefits and ensuring the longevity of the roof structure.

What are the Materials in a Drip Edge Roof?
Drip edges are typically made from metals such as aluminum, galvanized steel, copper, or vinyl. These materials are chosen for their durability and ability to protect the roofing system against harsh weather conditions.
Why Invest in Drip Edge for Your Roof?
Investing in a drip edge for your roof can prevent costly repairs down the road by safeguarding against water infiltration. The absence of a drip edge can lead to several detrimental consequences, including:
-
- Mold Growth: Water seeping into the attic space can create a damp environment conducive to mold growth, which can spread throughout the home and pose health risks.
- Rotting of the Roof Decking: Continuous exposure to water can cause the wooden roof decking to rot, compromising the structural integrity of the roof and leading to expensive repair or replacement costs.
- Damage to the Building’s Foundation: Over time, water dripping directly off the edge of the roof can erode the soil around the foundation, leading to foundation problems that can be extremely costly to fix.
These examples highlight the importance of a drip edge in maintaining the overall health of a building.
What Is Drip Edge Flashing?
Drip edge flashing is the metal strip that is installed along the margins of the roof to act as both a watertight seal and a neat, finished appearance for the roofline. It is an integral part of a comprehensive roofing system.
Steps to Install Drip Edge Flashing
There are steps to install drip edge flashing. Let’s take a look.
-
- Measure and Cut: Begin by measuring the lengths required for each section of the roof edge, then cut the drip edge material accordingly.
- Install Underlayment: Before installing the drip edge, lay down an underlayment, if applicable, to add another layer of protection beneath the roofing materials.
- Place the Drip Edge: Position the drip edge so it hangs over the edge of the roof slightly.
- Secure the Material: Nail or screw the drip edge into place, ensuring it is securely attached to the roof decking.
- Overlap Sections: Make sure each piece overlaps the previous one by at least an inch to ensure continuity and avoid gaps.
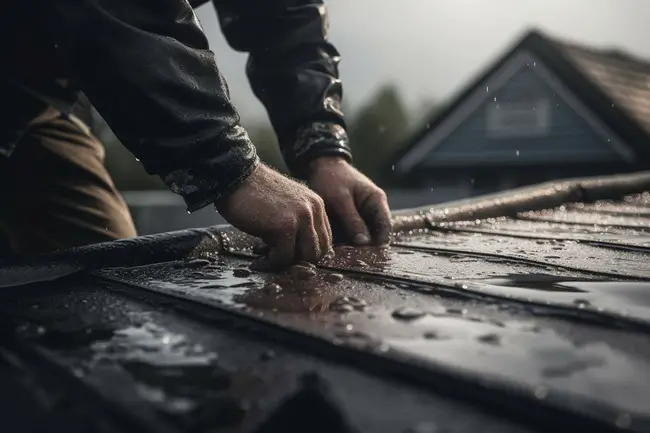
- Apply Sealant: To further prevent water penetration, apply roof sealant where the drip edge meets the roofing material.
The installation process of drip edge flashing is a critical step in ensuring the longevity and effectiveness of your roofing system. Here are detailed steps and potential challenges homeowners may face, along with tips for a successful installation:
Measuring and Cutting
-
- Accurate Measurements: Measure the length of each section of the roof edge where the drip edge will be installed. It’s essential to measure twice to avoid mistakes that could lead to wasted material.
- Cutting to Size: Use tin snips or a metal cutter to cut the drip edge to the required lengths. When cutting, ensure clean, straight lines for a professional finish.
Installation Process
-
- Underlayment First: If applicable, install an underlayment over the roof decking before placing the drip edge. This provides an additional layer of protection against water infiltration.
- Starting Point: Begin at the bottom of the roofline, such as the eaves or the lowest point on the gutter side.
- Aligning the Drip Edge: Position the drip edge so that it overhangs slightly off the roof edge. The overhang should not be too extensive to prevent wind uplift but enough to ensure water drips into the gutters.
- Securing the Drip Edge: Fasten the drip edge to the roof decking using roofing nails or screws. Space fasteners approximately 8 to 12 inches apart and ensure they penetrate into the solid decking.
- Overlapping Sections: Overlap each piece of drip edge by at least 2 inches to maintain continuity. For corners, miter cut the edges for a cleaner look.
- Sealing Joints: Apply a bead of exterior-grade sealant at the joints where sections overlap to create a watertight seal.
Potential Challenges and Tips
-
- Dealing with Corners: Roof corners can be tricky. Cut the drip edge at a 45-degree angle and ensure tight fits to prevent gaps where water can seep through.
- Ensuring a Watertight Seal: Use a high-quality sealant compatible with the roofing materials to seal any joints or edges where water might penetrate.
- Maintaining Aesthetics: For a neat appearance, ensure that the drip edge is aligned consistently along the roofline. Any misalignment can be visually apparent and may affect performance.
- Working with Existing Structures: Retrofitting drip edge onto an existing roof may require lifting shingles or working around obstacles like vents and chimneys, which can be challenging.
Final Advice
-
- Safety First: Always prioritize safety when working on a roof. Use a sturdy ladder, wear non-slip shoes, and consider using a safety harness.
- Check Local Building Codes: Some areas have specific requirements for drip edge installations, so it’s important to be aware of these regulations.
- Professional Help: If you encounter complex rooflines or steep slopes, or if you’re unsure about any part of the process, it’s wise to hire a professional roofer. They have the expertise and equipment to handle the installation safely and correctly.
By following these detailed steps, homeowners can ensure a proper installation of drip edge flashing. This will result in a watertight and aesthetically pleasing roofline.
Roof Maintenance
Now that you know about drip edge, let’s take a look at other roof maintenance.
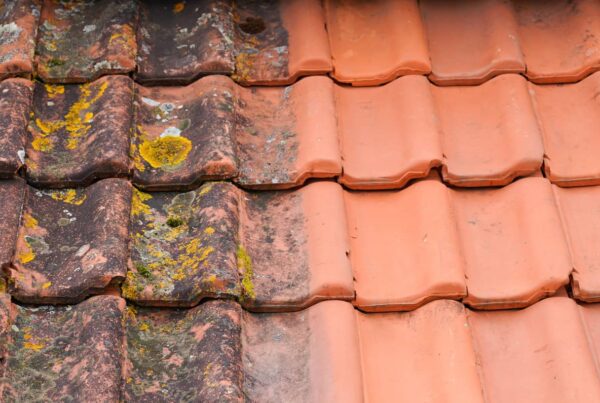
One of those is painting roof tiles. Many homeowners will do this so they can make their roof look nice and shiny. Since the tiles are in the sun and weather elements all day long, they become dull. Adding a new coat of paint freshens them up and gives the home a new look.
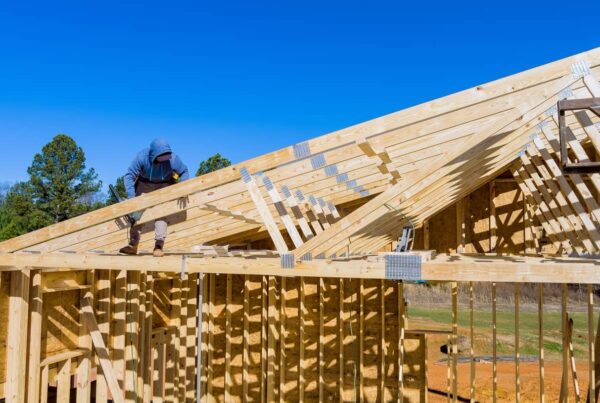
Another is roof truss. When you build a home, you need to know what the options are for your roof. This will then tell you what type of roof truss design you will need. There are different designs and the trussed roof connects sidewalls into the roof.
Lastly, are metal roofs cheaper than shingles? The answer is no, but the metal roof will last longer than shingles and will be more cost-effective in the long run.
When to Call a Professional
While some homeowners may feel comfortable undertaking the installation themselves, it’s important to call a professional if you are not confident in your abilities. Also, if you find the roof is steep or high. You may also find the roofing system requires complex fitting around angles and vents.
Check out the video below about installing drip edge on your roof.
Conclusion
Properly installed drip edge roofing is a crucial element of any roofing system. It not only protects the roof from water infiltration but also enhances the overall longevity of your roofing investment. Considering its importance, seeking professional advice or services is often the best route to ensure correct installation and optimal performance.
The cost-effectiveness of a drip edge is clear when weighed against the potential expenses incurred from water-related damages. This makes it a wise choice for homeowners looking to protect their property from issues like mold growth, rotting of the roof decking, and foundational damage. This is a great time to reach out to Waypoint Property Inspection to inspect your home in Tampa, St. Petersburg, Lakeland, Orlando, Palm Beach, Ft. Lauderdale, and surrounding areas.